
A visit to a nearby observatory sparked my interest in Astrophotography – taking pictures of the heavens. This is a rewarding hobby even for suburbanites but requires some equipment and expertise.
With some effort, one is definitely rewarded with stunning “self-made” images of stars, giving one a new perspective of what is up there in the sky as well as the satisfaction of being a “citizen scientist”.
My initial inclination was to purchase one of the many telescope offerings in the sub-$1K range and combine that with some DSLR camera accessories and hook it to my Sony camera.
After some research I concluded however, that the telescope-based astrophotography requires some fairly decent equipment to be frustration free – primarily an auto-calibrating tracking mount with solid PC interface and a camera that can be controlled from software as well as a DSLR camera interface. My Sony A6000 was unfortunately not very astrophotography-friendly, as it does not provide good integration with any of the control-software programs without hacks. So, without spending at least $2-3K into stuff, this would likely have been a short lived hobby.
A good option for a beginner is therefore a much cheaper setup: simply use a camera + zoom lens combo that many (including myself) already have. Long-exposure images with a zoom lens of 3 seconds or more requires the following additional equipment at a cost of about $500.
- Shutter cable for existing DSLR Camera ($20)
- Sturdy tripod with ball head mount ($50)
- Sky-Watcher Star Adventurer motorized tracking mount ($320)
- Sky-Watcher Latitude (EQ) base ($80)
Additional accessories that I also purchased were:
- PS Align Pro (polar scope alignment app) ($2)
- Adjustable neutral density filter for zoom lens (for moon-shots) ($20)
- Light pollution filter for zoom lens (for urban areas) ($30)
- LED headlamp with “red-light” mode ($30)
The final image was created using some free or open-source software:
- Sony A6000 touch-less shutter app – to take vibration-free test images
- Stellarium – to find potential areas in the sky to takes pictures of, or to identify the stars in the final images
- ImageMagick and dcraw– to convert RAW/ARW images into TIFF images
- Deep Sky Stacker – to calibrate and combine (“stack”) the TIFF images
- GIMP – to crop and color/brightness/contrast adjust the stacked image
In preparation of taking actual images, one needs to get beyond the “point-and-shoot” usage and learn the ins-and-outs of the camera controls, since everything will be configured manually when taking images. Specifically one must be familiar with:
- Entering manual setup mode
- control aperture (lowest F = most light)
- control exposure (3-5sec for quick test shots, “bulb” mode for tracked shots and shutter cable)
- control ISO (16000 during focusing, 400-1600 for tracked shots, 100 for moon shots)
- Zoom-view of viewfinder while focusing
- one needs to move the camera to find a bright star and place it into the center of the viewfinder
- one needs to manually focus on the star while in viewfinder-zoom mode
- Configuring RAW (for Sony, ARW) format for storage
- using JPEG prevents proper “stacking” (post-processing) of the images
The second learning phase involves the other equipment; one needs to get specifically good with the setup and calibration of the mount as well as attaching the camera.
- Main tripod assembly
- The Star Adventurer is assembled on top of the EQ base, which in turn needs to be firmly mounted on top of the tripod.
- The EQ base is pre-adjusted to the current latitude at the location of the observer.
- The polar scope is pre-adjusted so the grid is horizontal.
- Batteries for both the mount and illuminator are full/charged.
- Camera assembly
- The ball-mount attaches to the camera and is terminated with the slide mount that connects it easily to the rotating Star Adventurer head.
- Zoom lenses, filters, and shutter cable are preferably pre-attached to the camera before heading out.
- Battery of the camera is charged (maybe bring a backup battery) and storage space is available.
- Tripod setup
- The tripod needs to placed on sturdy ground (i.e. no vibrations while moving around it; legs don’t sink into the soil while using it) and made perfectly level using the bubble in the Star Adventurer (the head lamp comes in handy now).
- The tracking mount needs to be north’ed using first an approximate alignment towards Polaris (should be visible), then accurately with the illuminated polar scope and the software.
Let’s assume the equipment is ready and you find yourself in a place without too much light pollution on a clear-sky at night. The actual image acquisition run over a 30 min-2 hours period and proceeds as follows:
- Head out into the night with the tripod and camera pre-assembled, camera dangling over your neck, polar scope illuminator and phone in your pocket. If it is cold, dress warm as you’ll be out there for a while. It is also good to have a plan of what area of the sky to image, and how to find that area based on a compass, the declination, and visible bright stars or constellations.
- Setup the tripod in a flat spot with a clear view of Polaris, level it, and pre-align the polar scope towards north by eyeballing the approximate direction.
- Attach the polar scope illuminator, then adjust the EQ mount and tripod so that Polaris appears exactly on the position indicated by the App in the polar scope ring. Lock all adjustment screws and double check the alignment. After this adjustment, one needs to be very careful not to bump, change or move the tripod or EQ/tracking mount in any way.
- Attach the camera to the tracking mount, plug in shutter cable, turn camera to a high ISO setting (i.e. 16000) and use the ball head to swivel the camera around to find a bright star. Place the bright star into the center of the viewfinder and manually focus on the star (note: the displayed focus distance will not be “infinity”).
- Take a test shot with a medium ISO setting (i.e. 6400) using 1-4sec exposure and verify the focus again one more time. Use a remote or touchless shutter control method to avoid vibrations or shaking while taking the test shot.
- Repoint the camera to the approximate area of interest. Use bright stars visible in the viewfinder to approximately locate the field of view being imaged. Take test shots as before to verify that the camera is pointed to the desired field of view.
- Configure the camera for “bulb” exposure and low ISO setting (i.e. 400-1600). Turn on Star Adventurer into acquisition mode – the first image should be taken as a 50 sec (default) exposure. Check the image in the viewfinder (should be shown for a second). This first image is generally a “throw-away” since turning on the tracker creates vibrations.
- Wait while images are being collected (any number is fine, the more the better; I’ve collected up to 60 images in one 1 hour session).
- Place the lens cap on the camera and collect a few more “dark” images. The last image in the sequence is generally a “throw-away” since placing the cap on the lens will create vibrations.
- Turn off tracker and camera.
Now that one has collected images, it is time to process them and produce the final combined output to admire, analyze and share with friends and family.
- After downloading the images from the camera to the PC, perform a quick quality check and delete any test shots, or images with obvious flaws (i.e. vibration smears, clouds) or other imperfections (i.e. visible satellite or airplane tracks).
- Deep Sky Stacker (DSS) seemed to work better when the input was 16bit TIFF tiles, so I converted the source images to TIFF format using the following script:
FORFILES /S /M *.ARW /C "cmd /c dcraw -v -o 1 -4 -b 3 -O @fname.ppm @fname.ARW"
The “-b” parameter is a brightness factor; I varied it based on the image set between the values 1.5 and 4.
FORFILES /S /M *.ppm /C "cmd /c magick convert -verbose @fname.ppm @fname.tiff"
DEL /F *.ppm - Next, all “light” images are loaded into DSS together with one or more “dark” images. Then the program is allowed to do its job to calibrate and create a combined output.
- Experiment with the various combination algorithms and settings. For example, use “median” for the “light” images to get rid of airplane tracks in the field of view.
- DSS has additional calibration image options for flat-field correction; I’ve never figured out how to take/calculate those, so skipped over this step.
- The combined TIFF image from DSS is loaded into GIMP. The histogram curve, brightness, contrast, and saturation values are adjusted until the image looks respectable and interesting. The image is then saved as PNG or JPG.
Below are some of the results (click image to zoom in).
The “Tests” Set
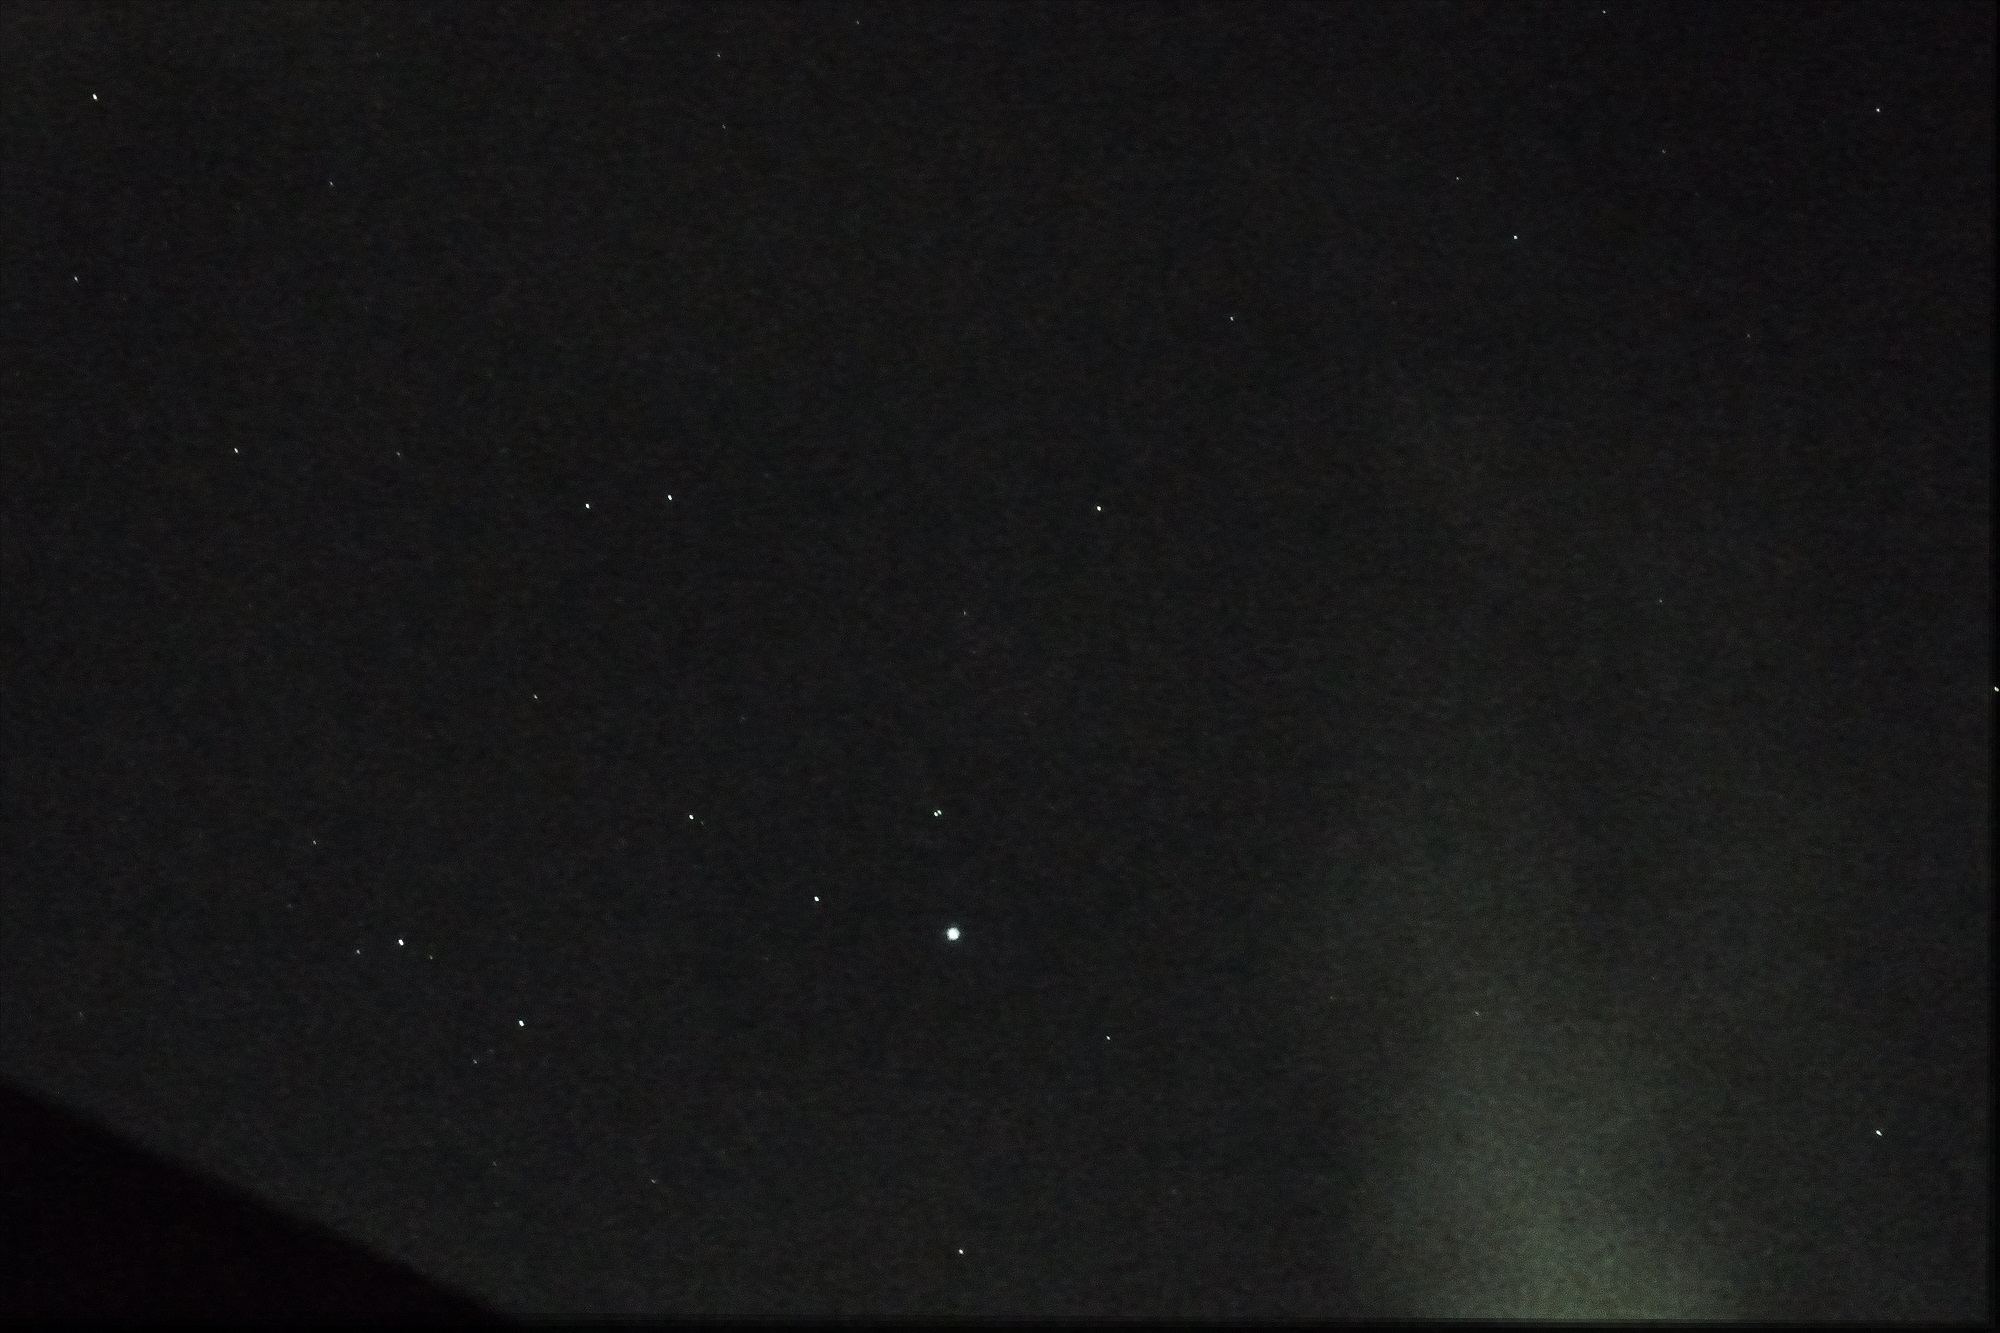
The “1st light” shot was taken next to the house in less than optimal conditions showing only a few stars, a lot of noise due to the high ISO setting, and comes with some clouds and the neighbors roof it it as well.
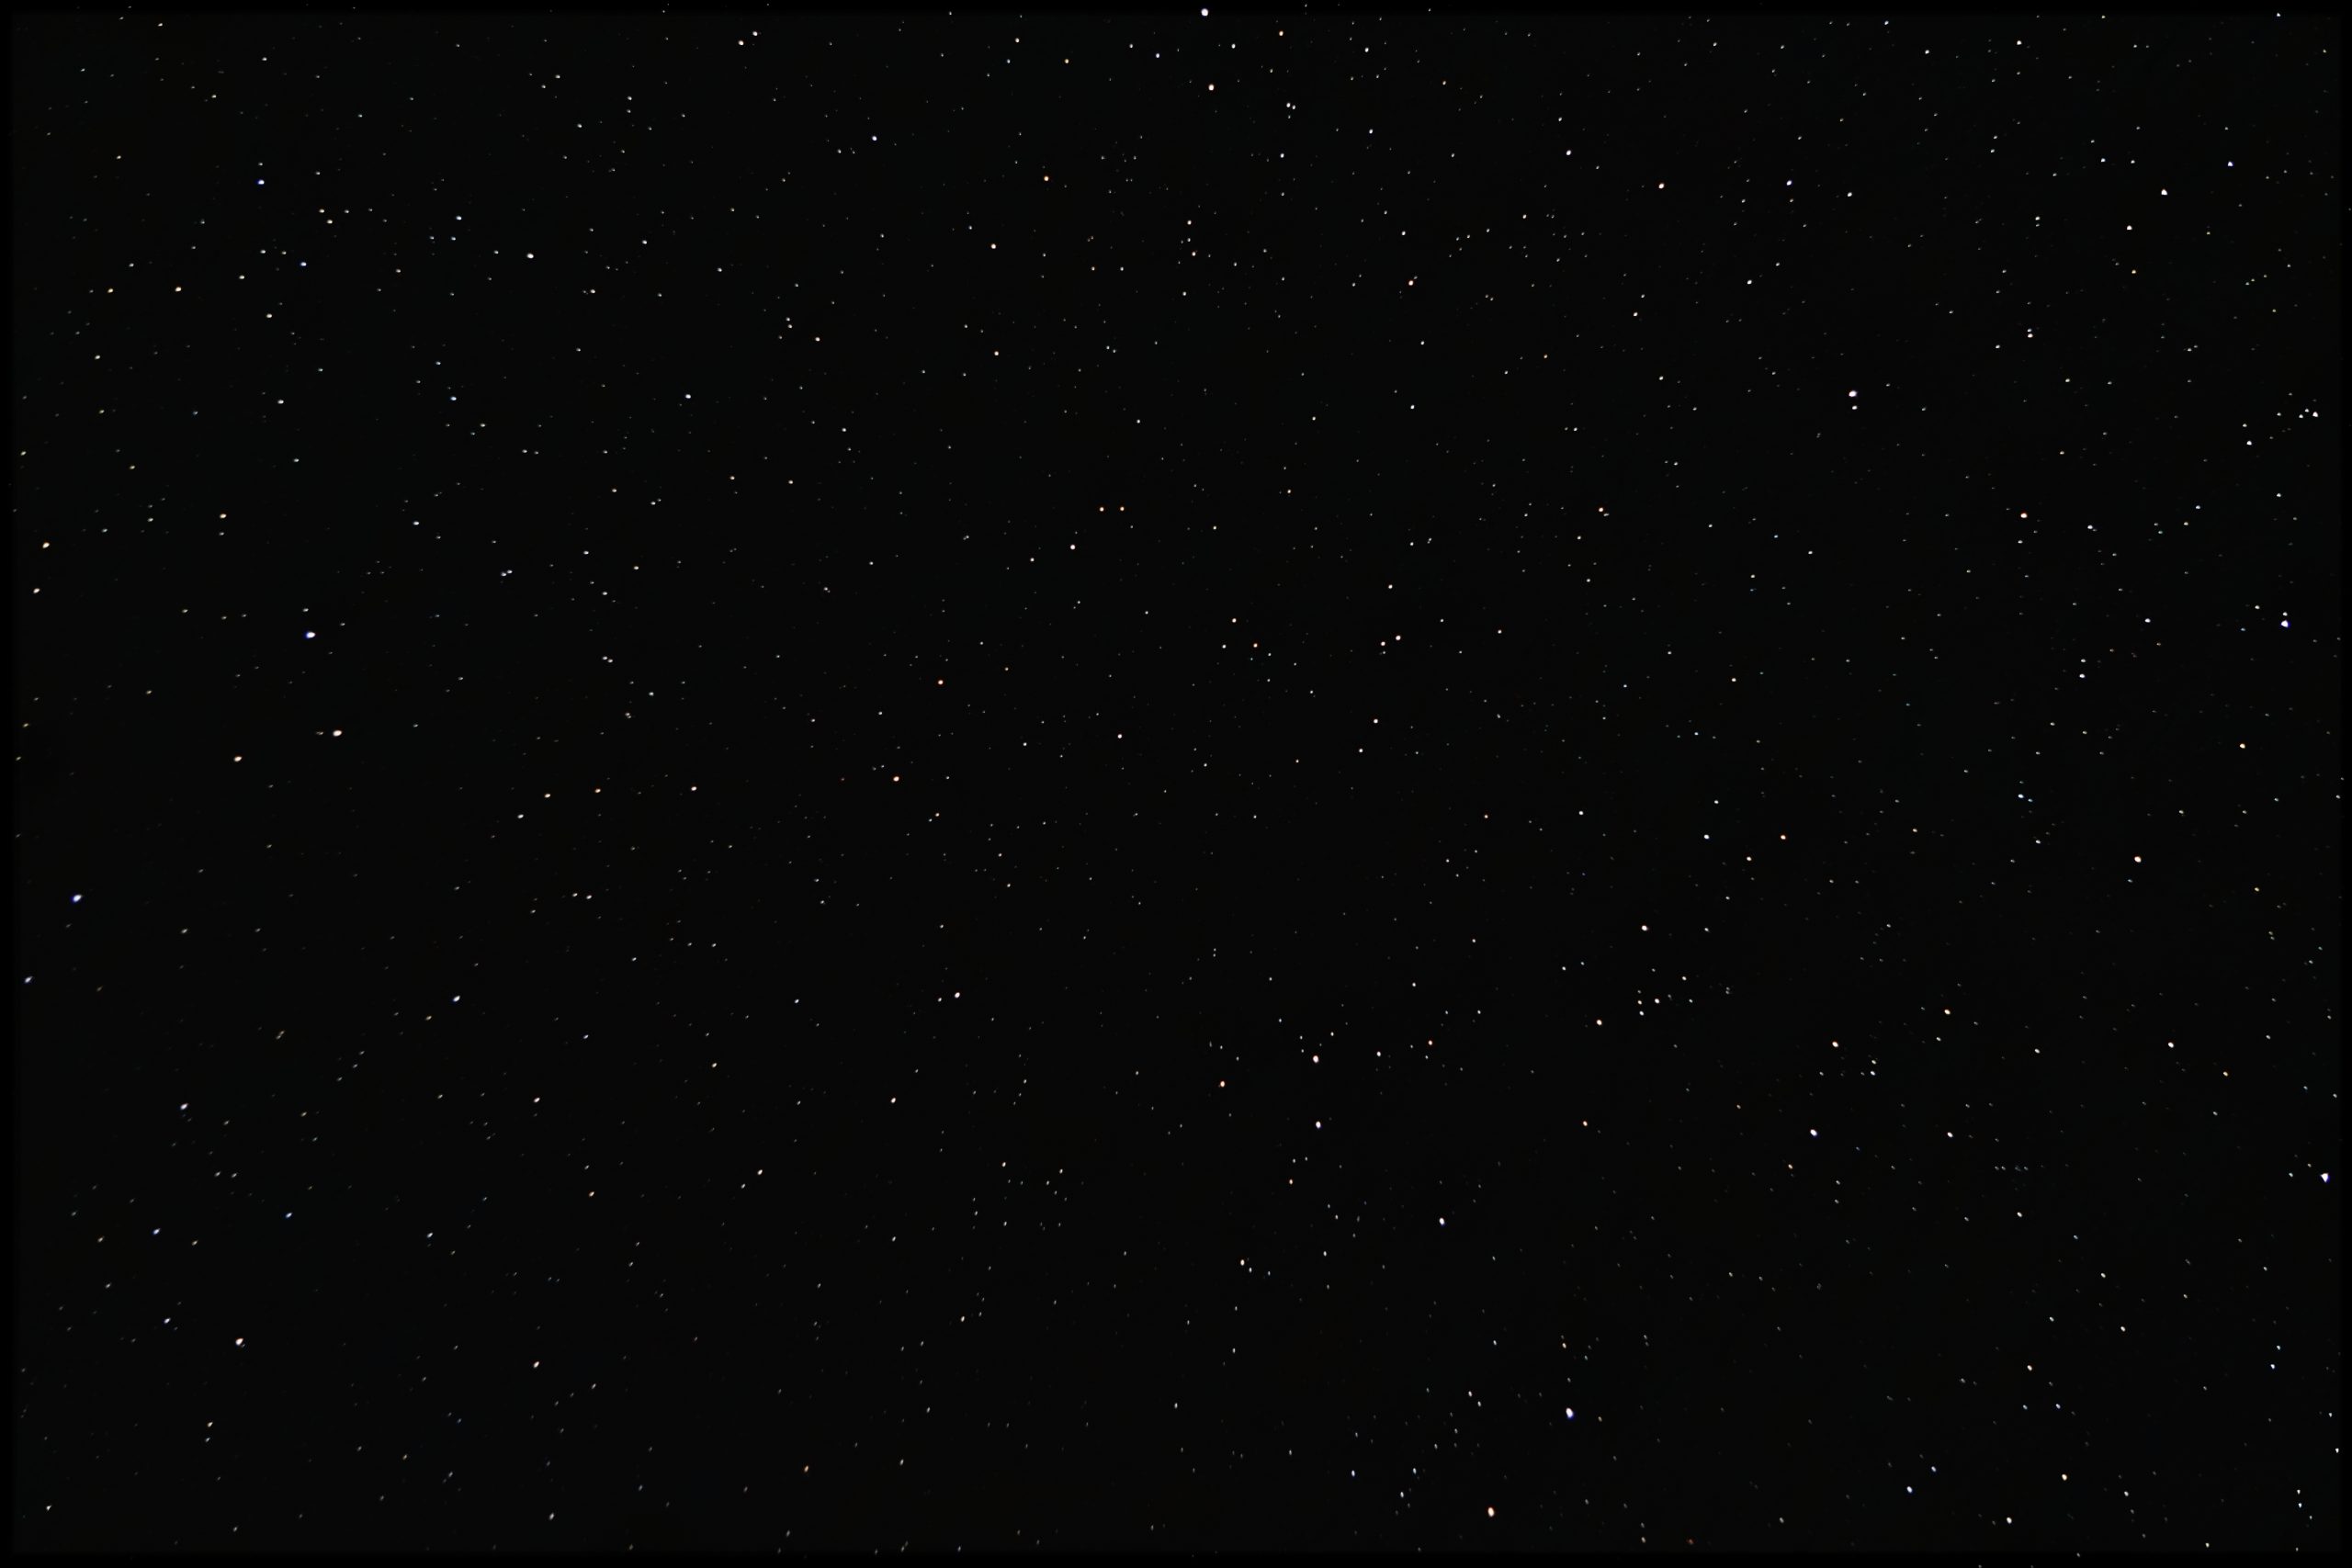
The 2nd attempt used a much lower ISO, better calibration and over 30 stacked images to get some nice contrast.
The 3rd test shot was trying to capture the milky-way using a higher ISO setting. It is visible as vertical band, but at the expense of quite a lot of overall image noise. Also clearly visible is the darkening effect at the edges from the cheap bundled zoom lens.

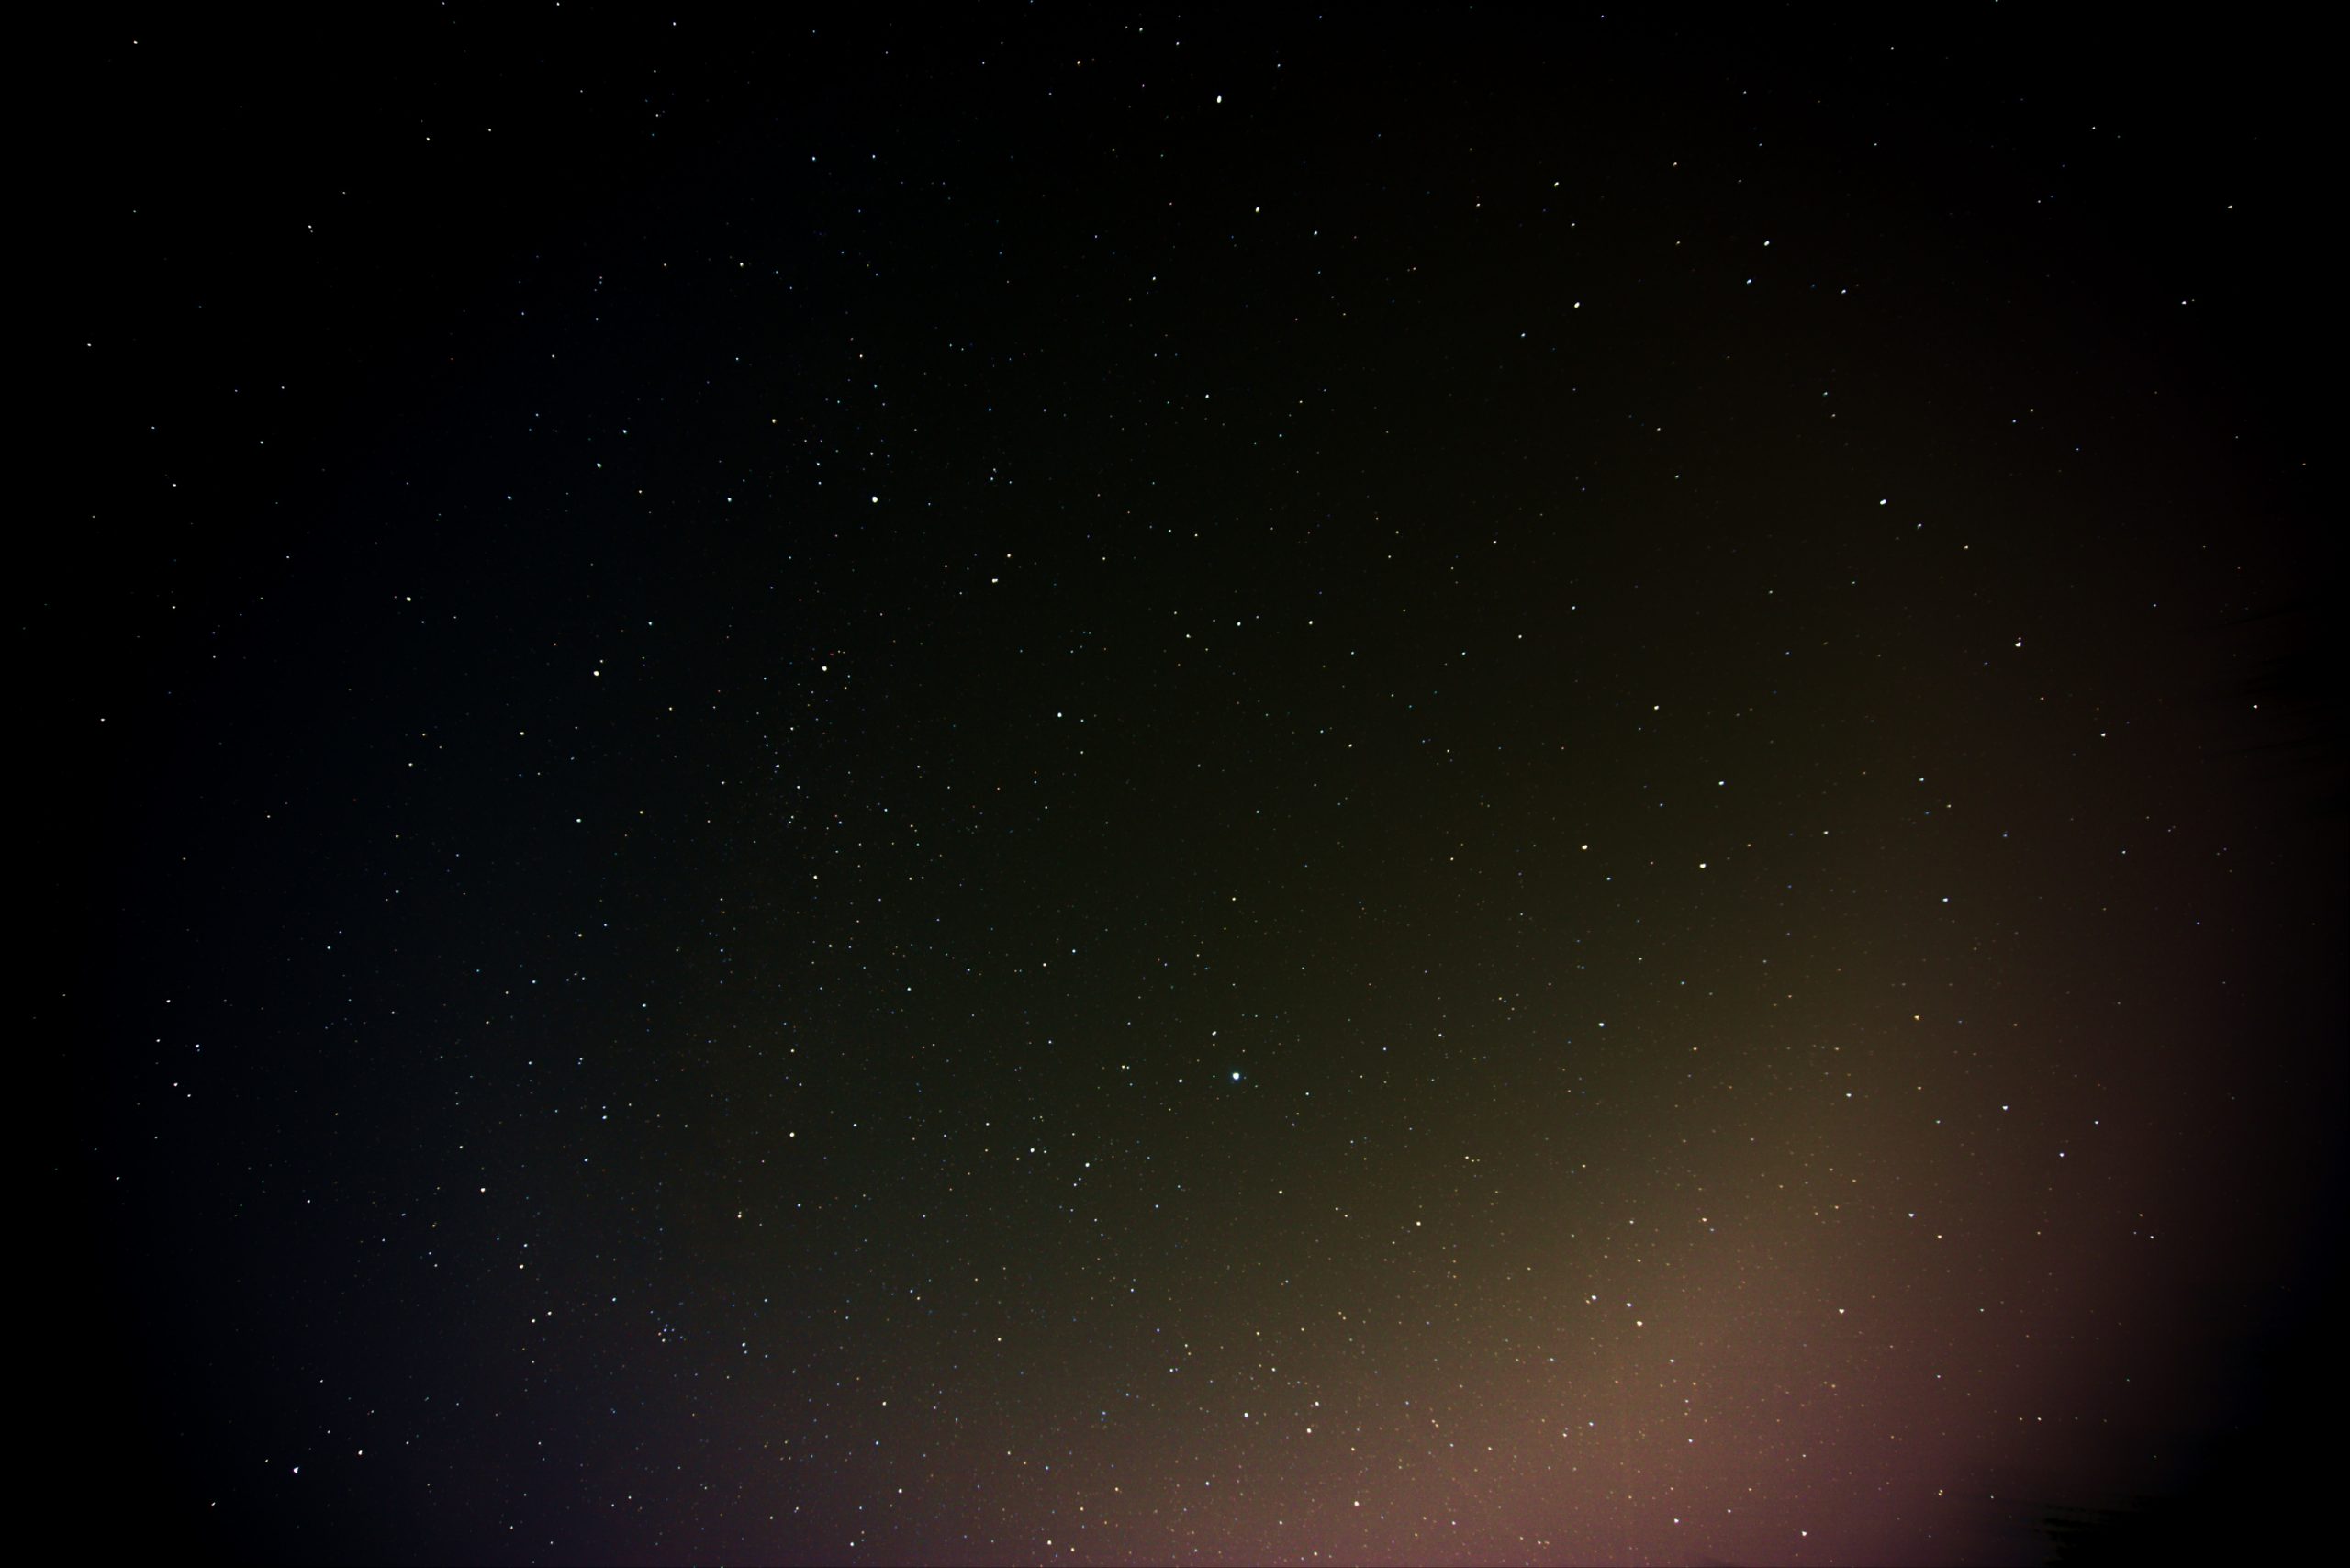
The 4th test shot has some nice detail as well as color, but the light pollution bleeding in from the city forced a contrast increase during the post-processing so the lower right isn’t washed out, lowering the amount of stars visible in the image.

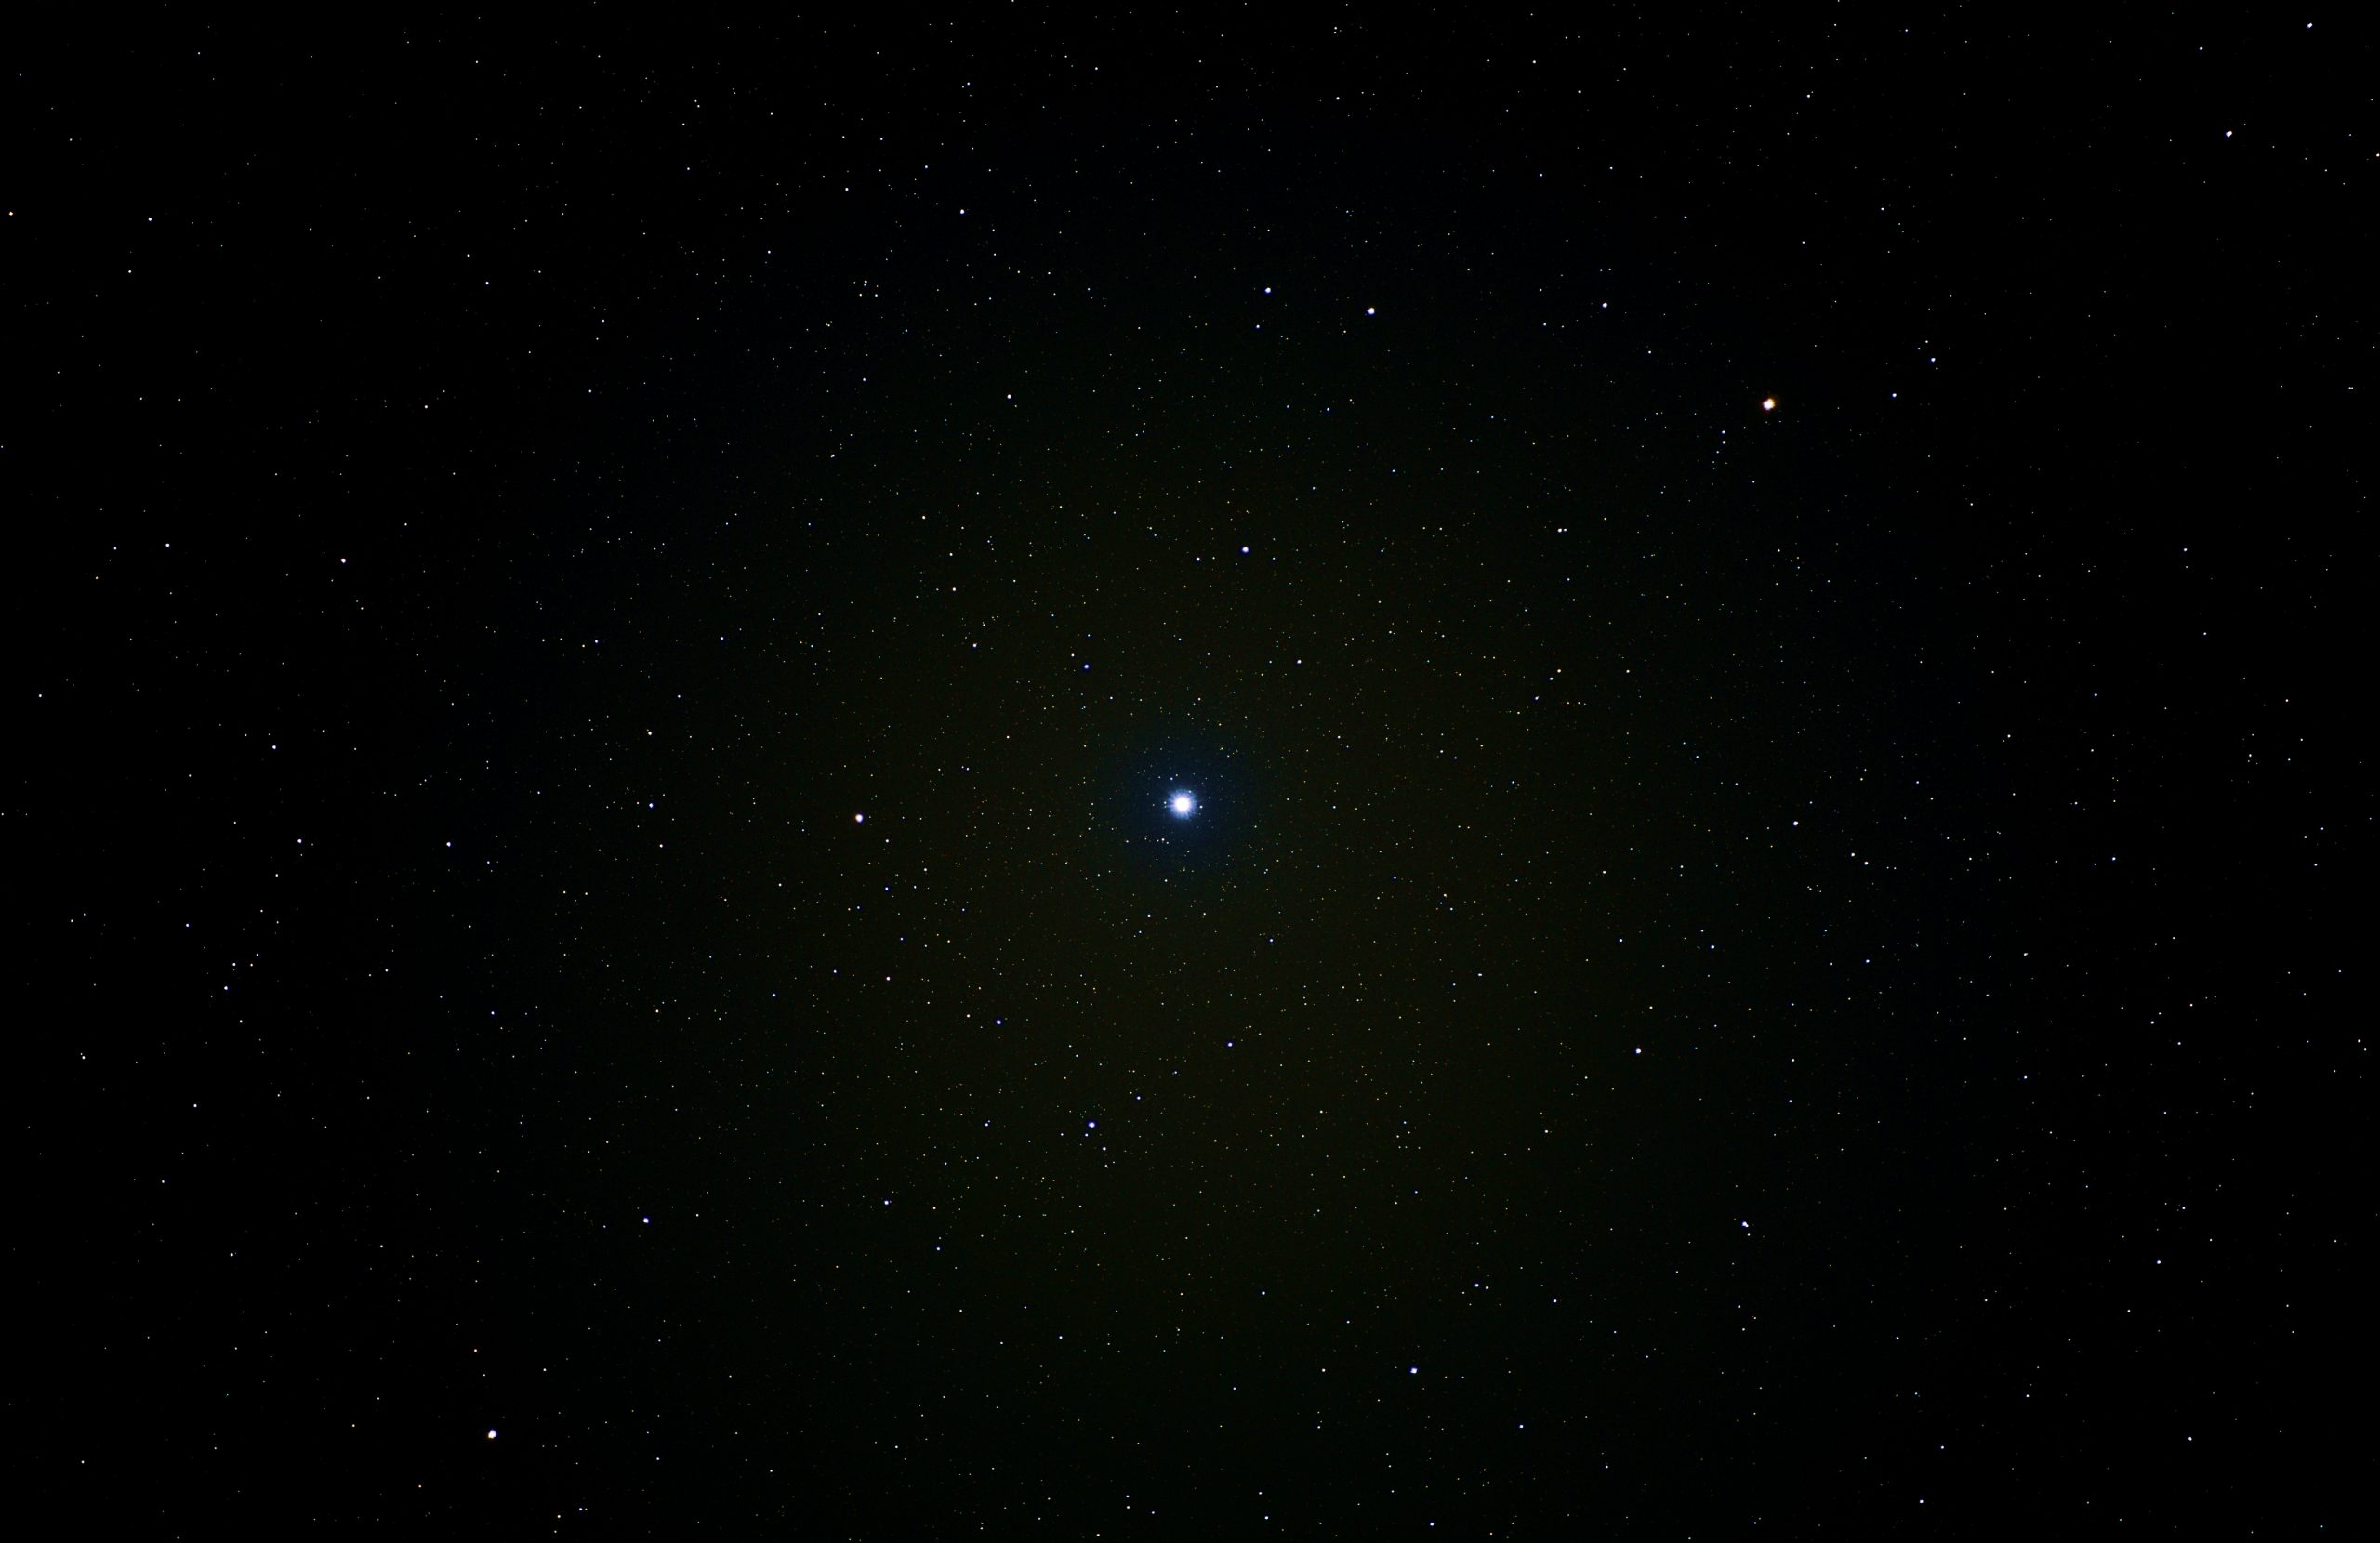
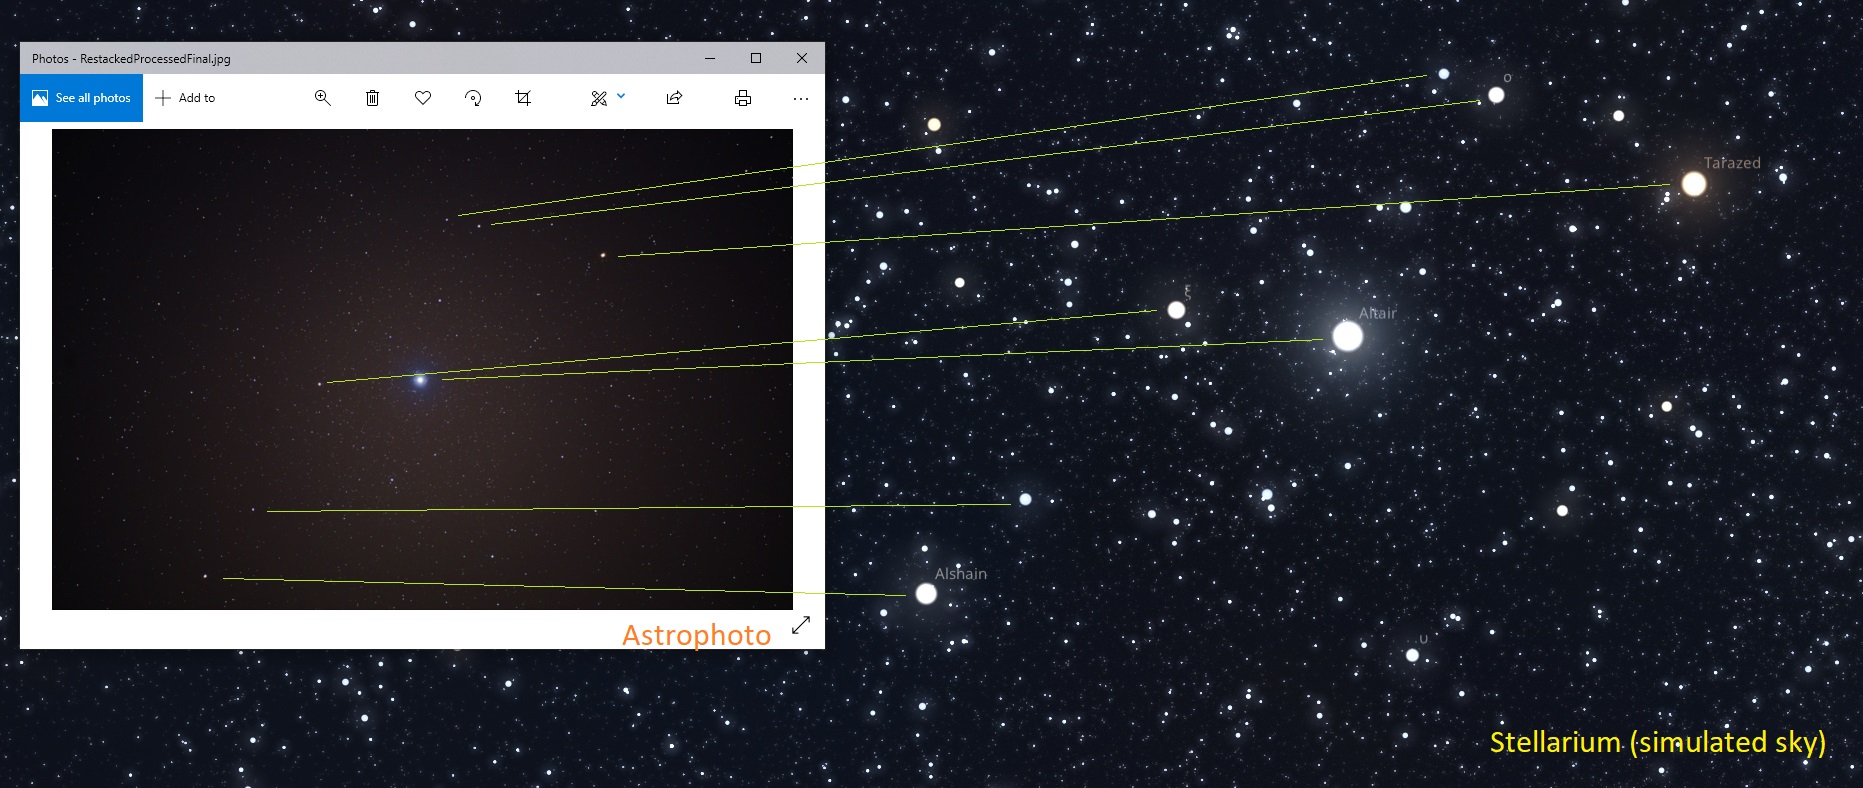
The 5th test shot was a bit of a graduation image for my hobby and shows Altair – a bright blue sun. Due to the clear spectral signature of the star and its surrounding bright stars, it was easy to locate it in Stellarium.
The final and 6th image in the “test series” is a repeat of the previous light-pollution shot, but still quite detailed when zooming into the darker parts.
Ottweiler Winter Set
The next set of images were taken in Ottweiler, Germany during the winter while I was on vacation.
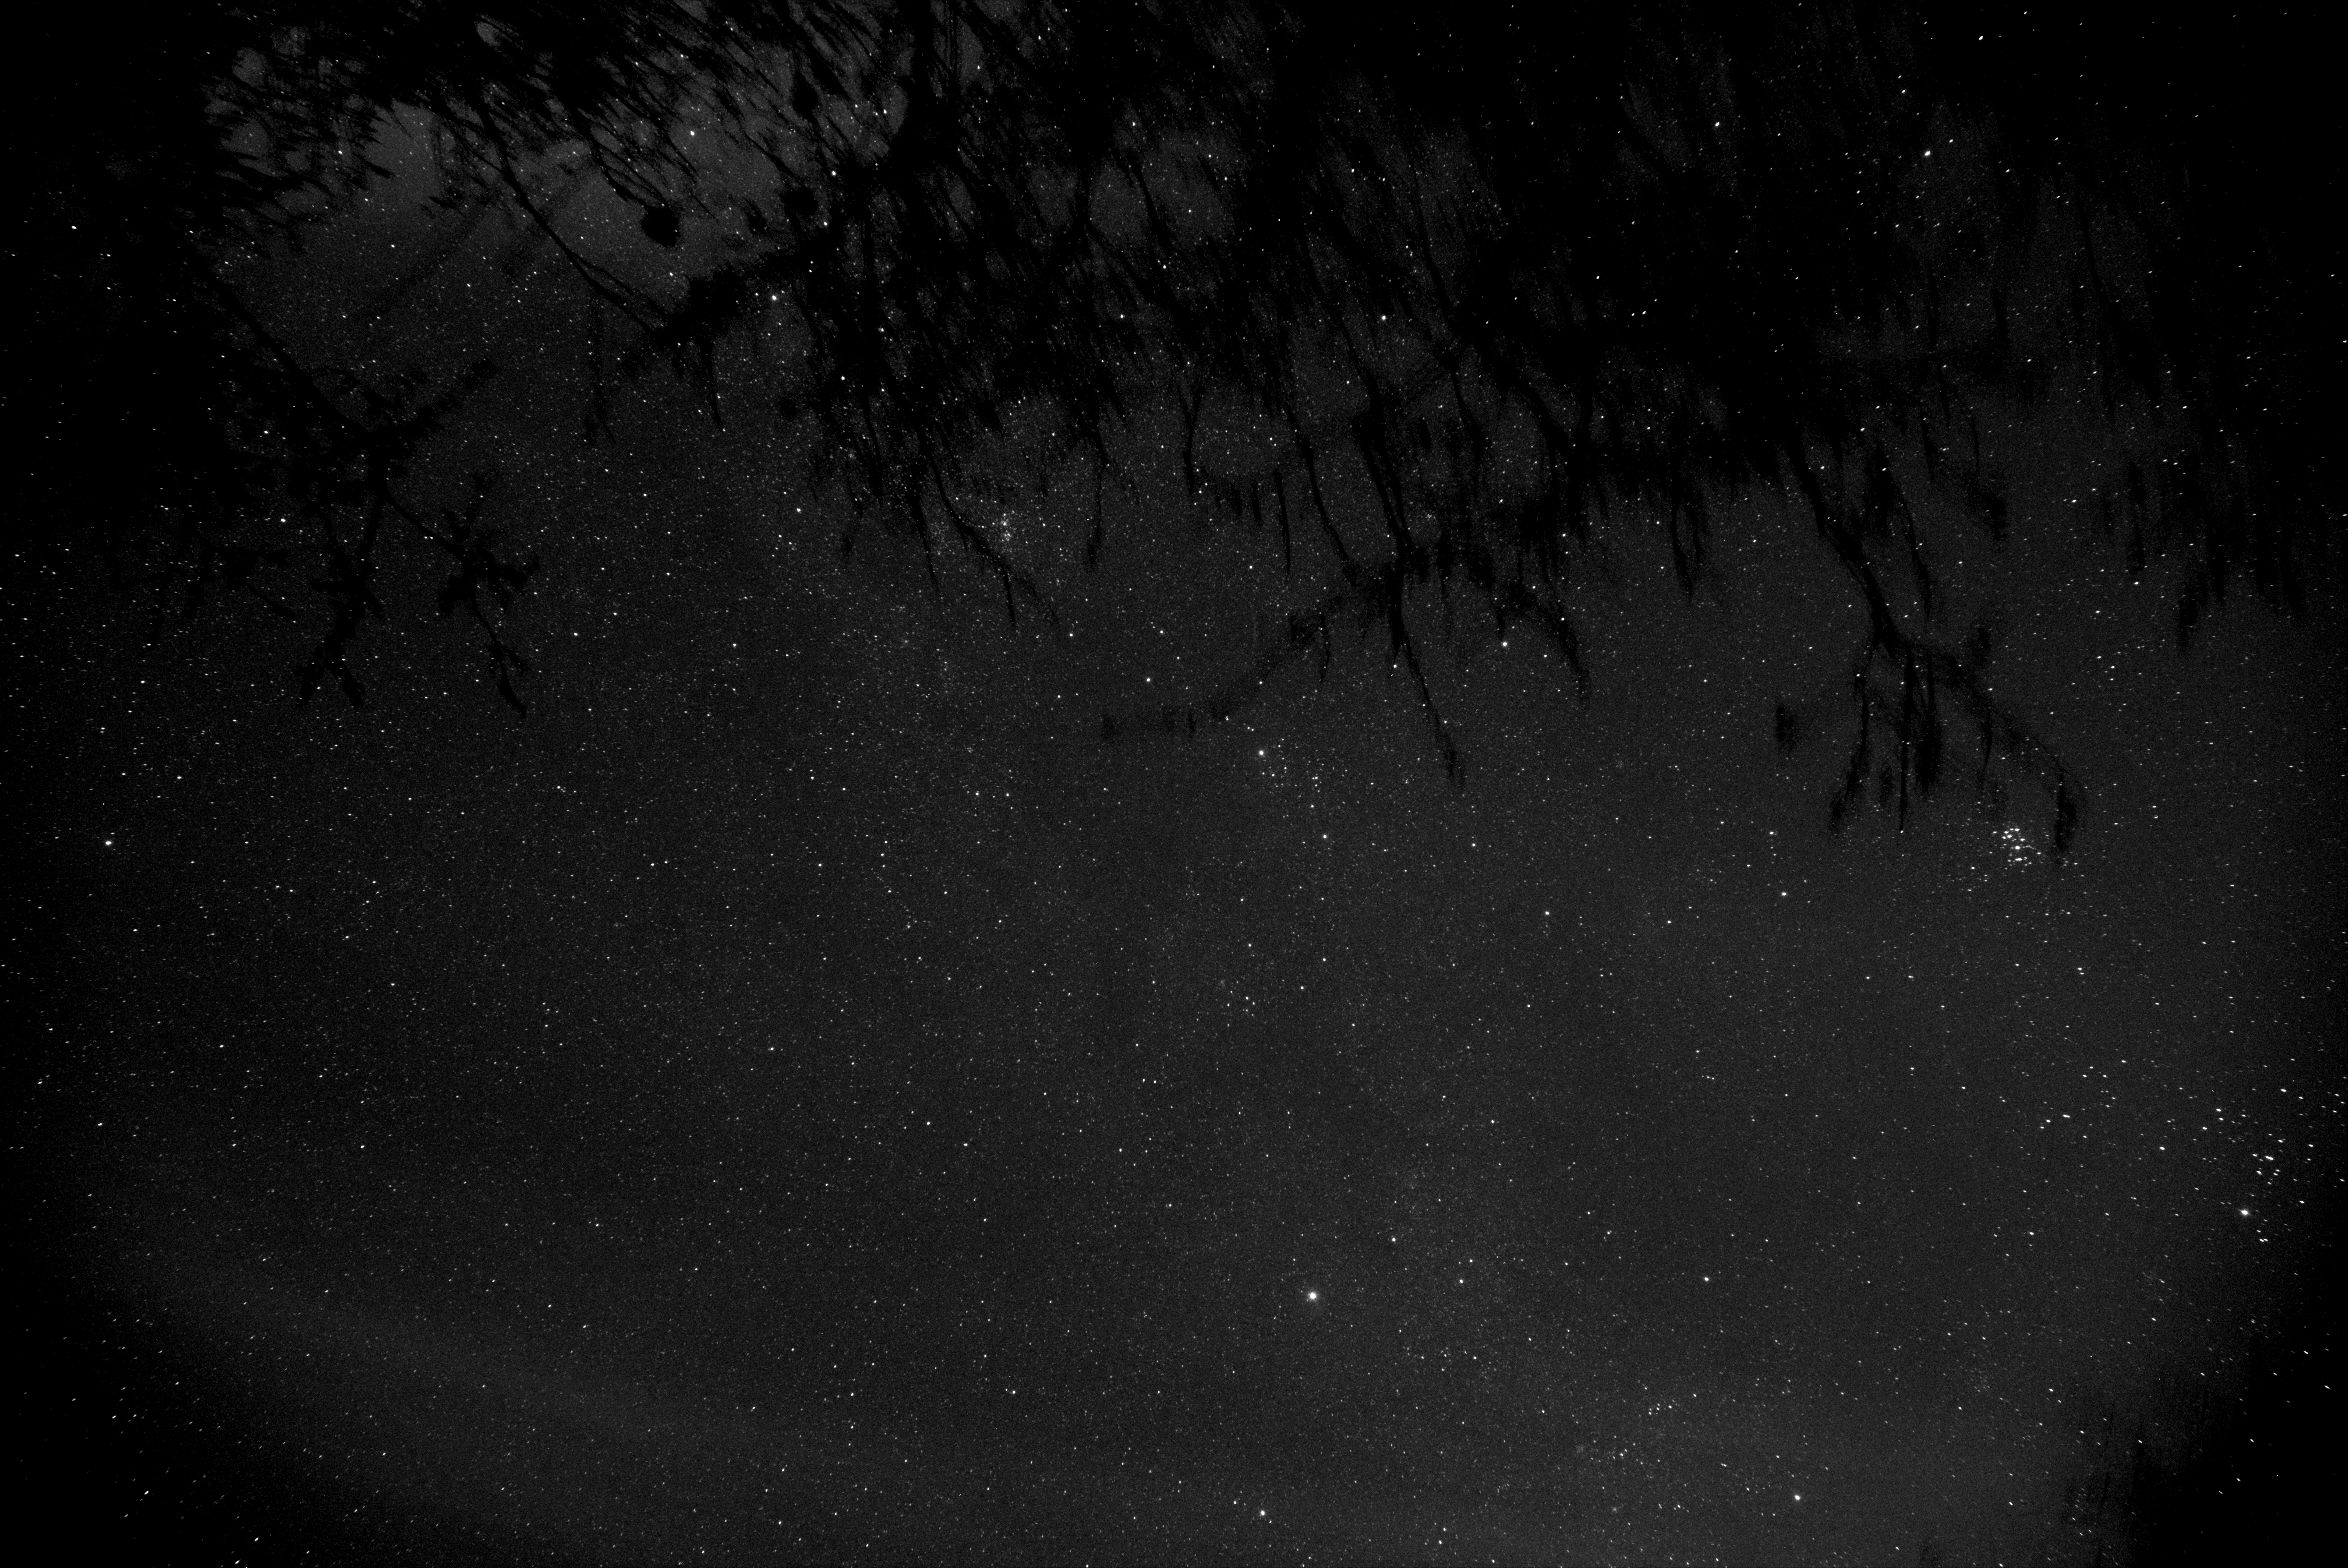
The following is a shot without the zoom lens and thus a 15deg wide angle shot with a hint of the milky-way and some nice tree branches for perspective. Note the bright cluster of stars in the middle right – it looked like a smear to the naked eye, but was easily resolved into individual stars with the camera.
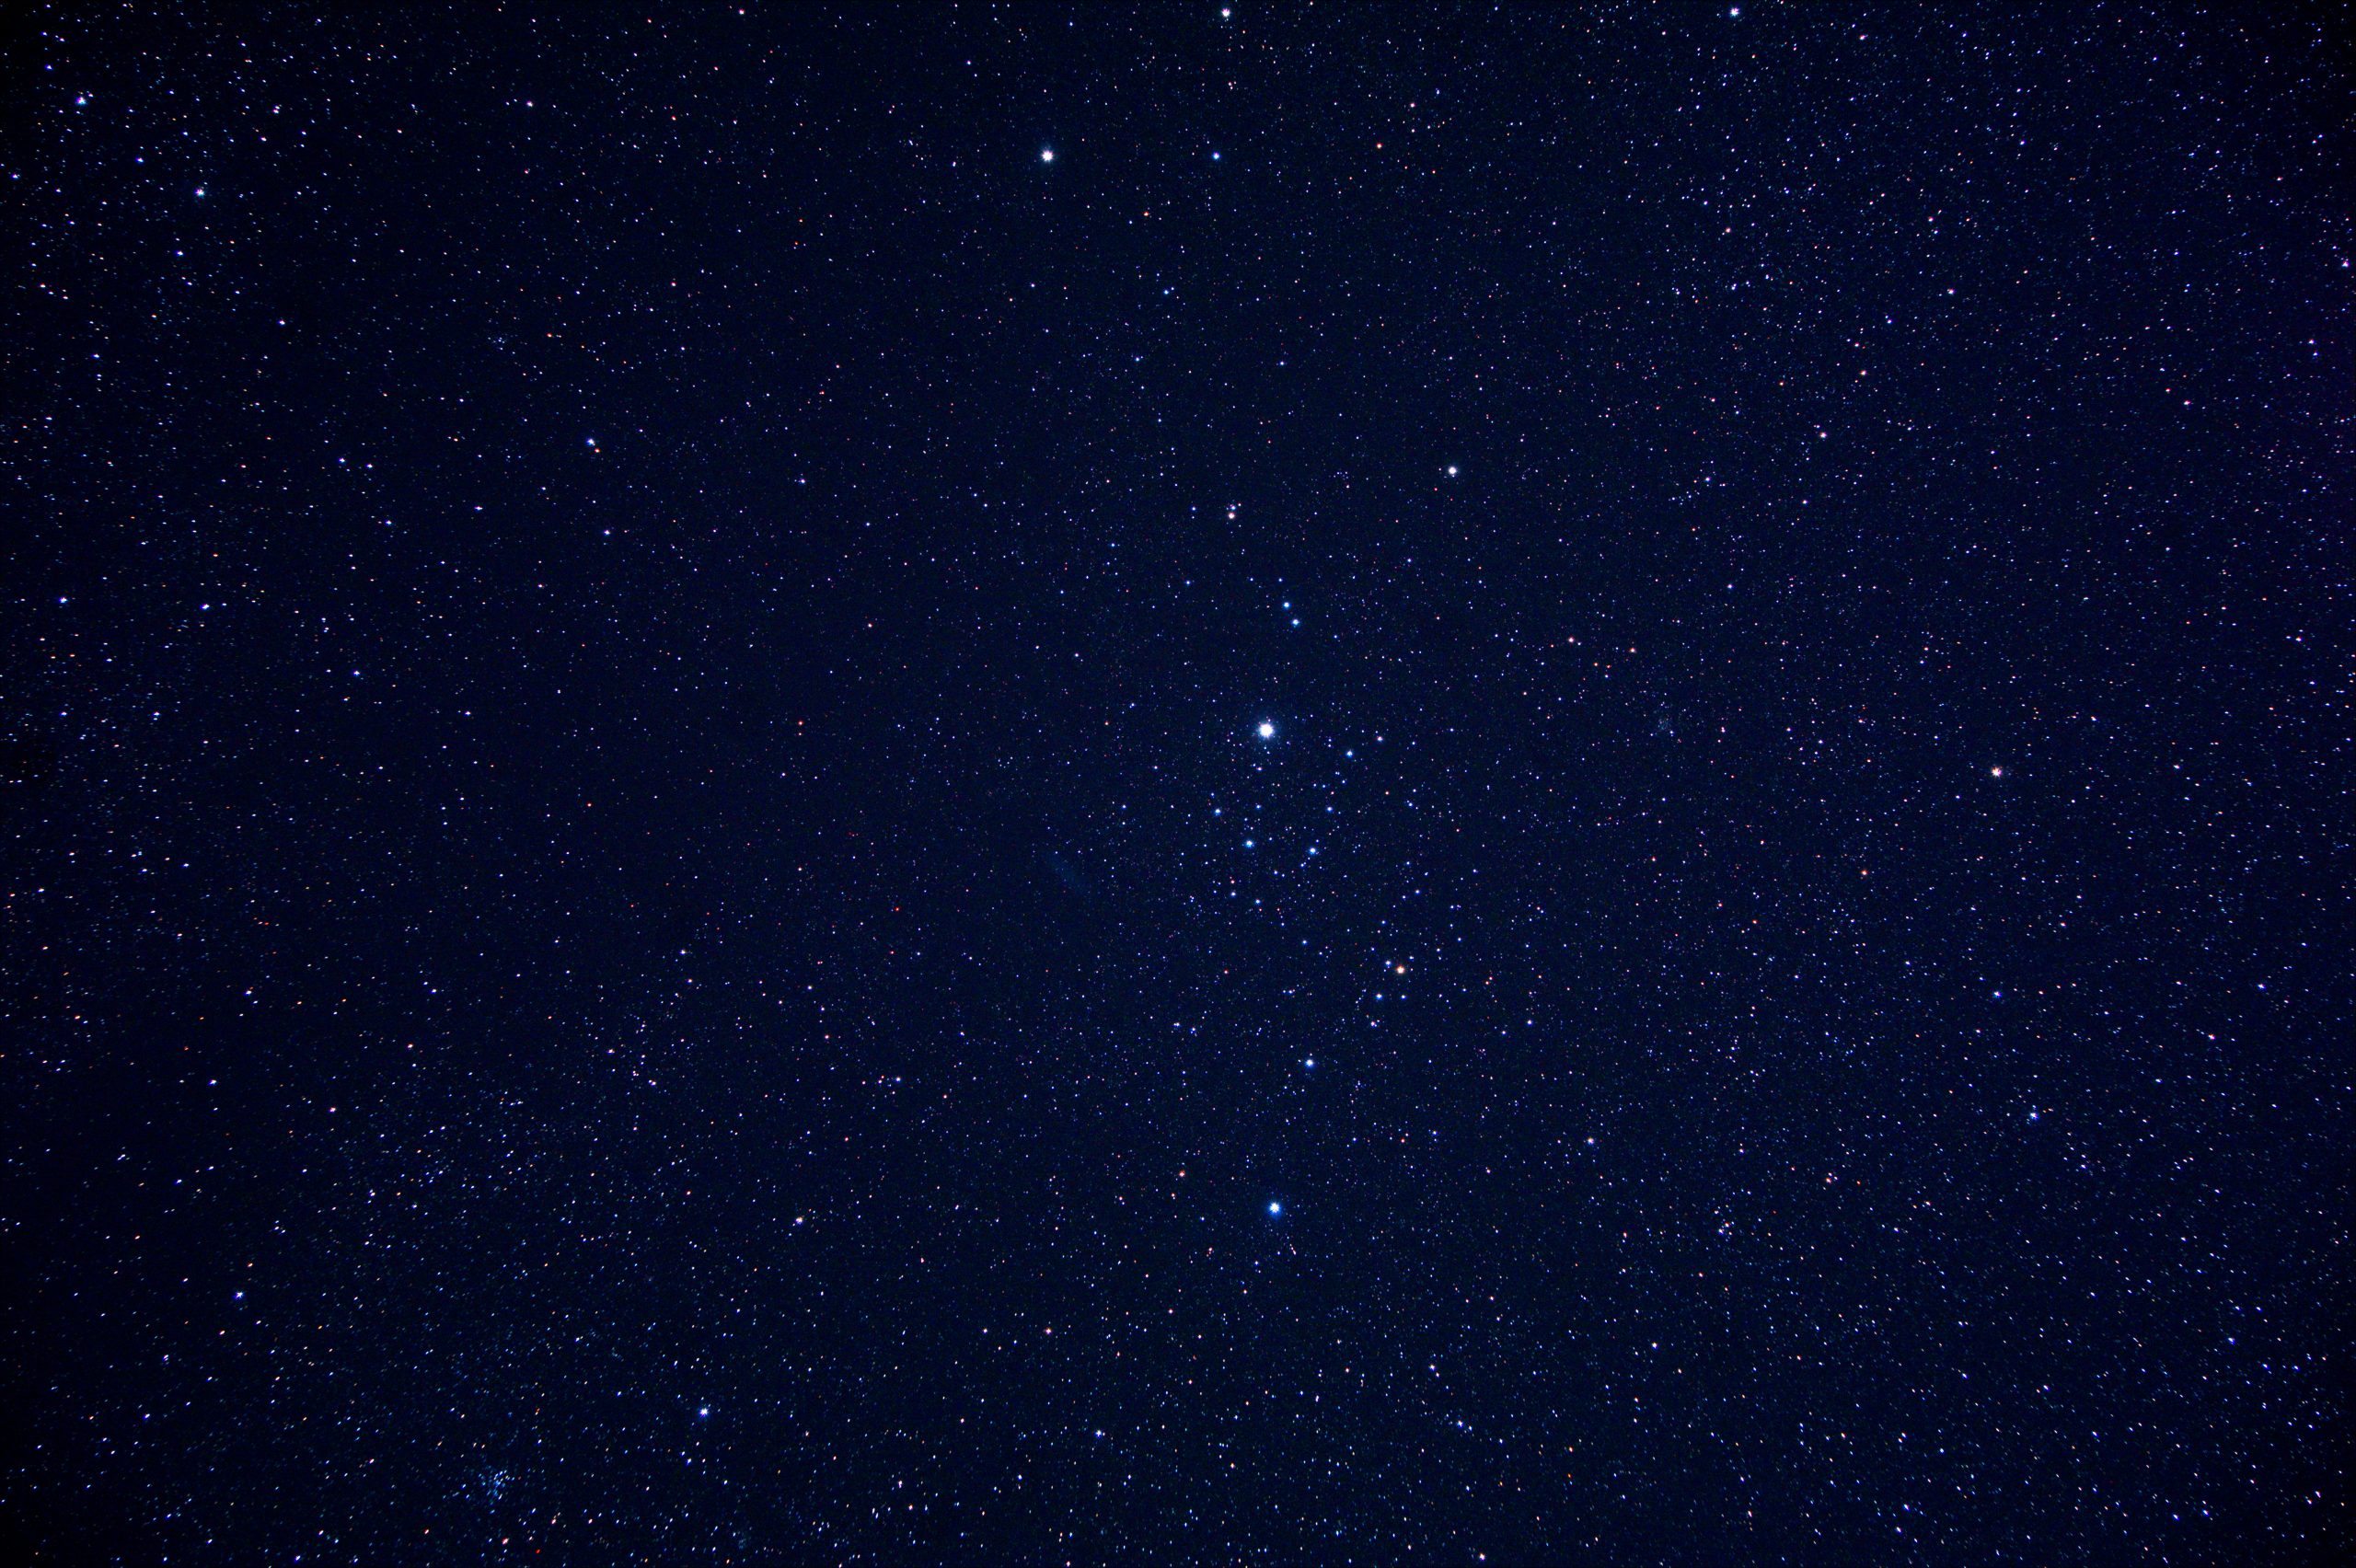
Zooming into the cluster mentioned before, it turns out to be a group of bright blue suns about 300 light years away.

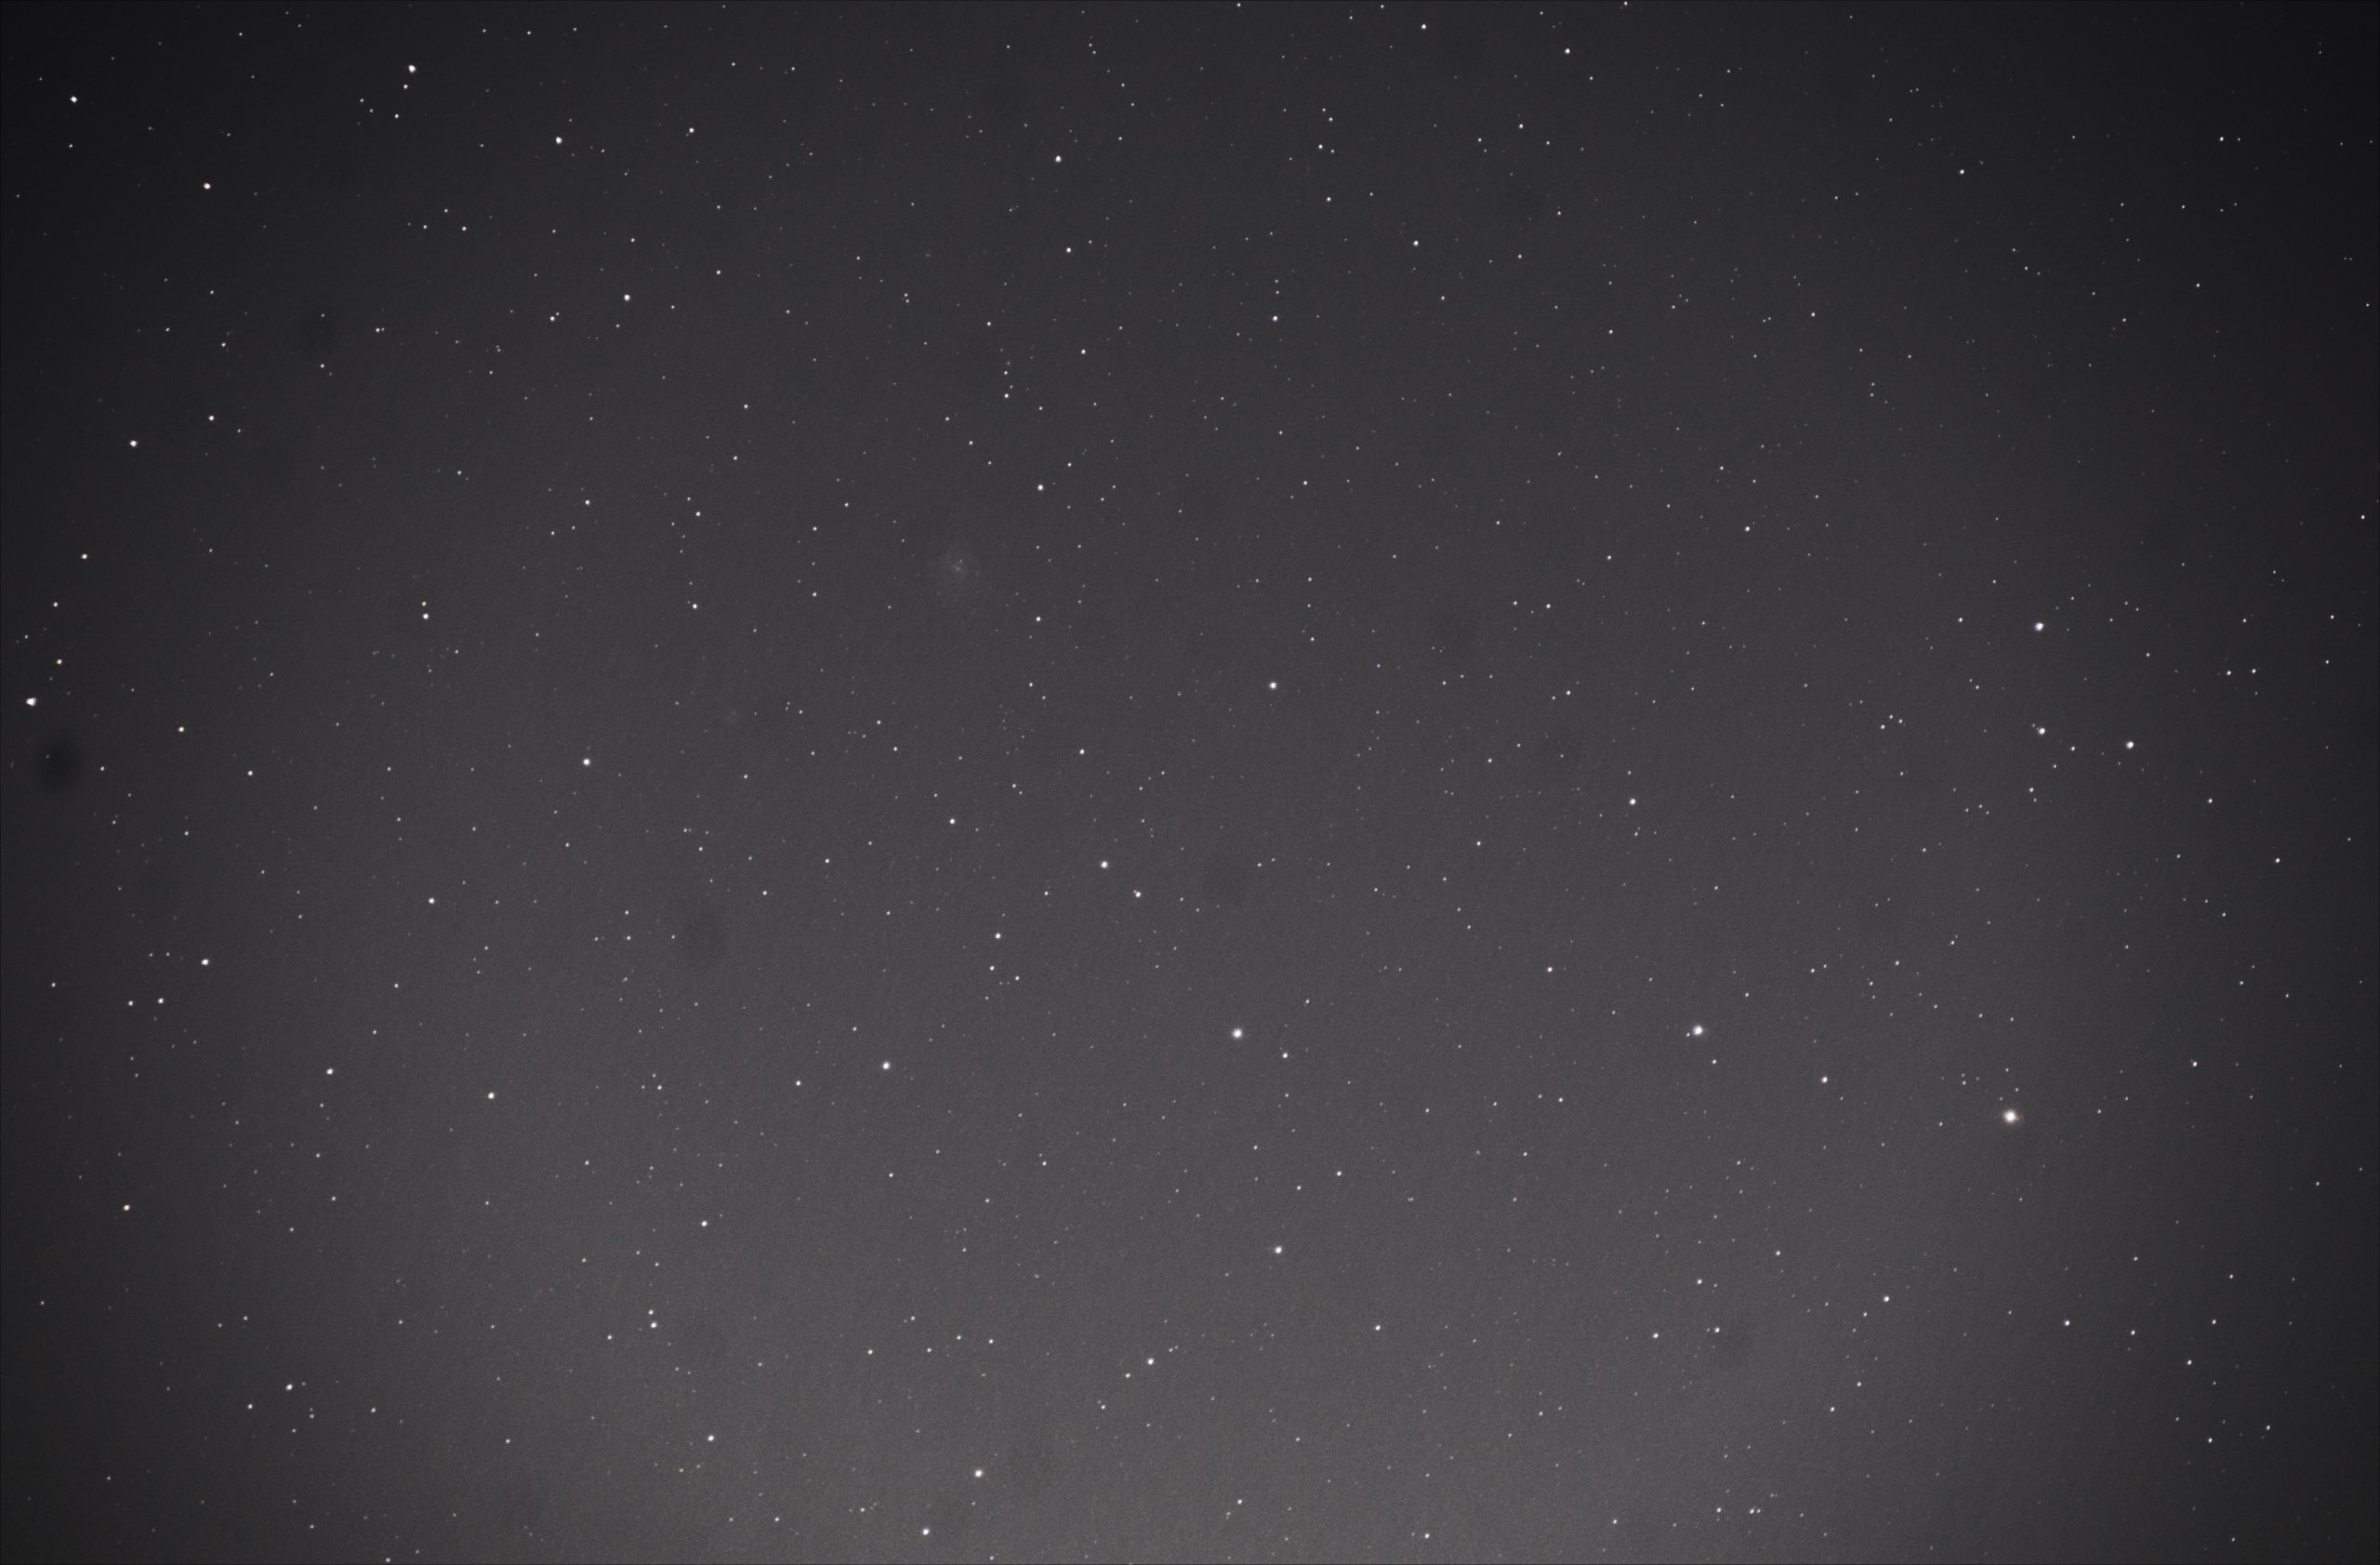
Pointing the camera straight up and into the milky-way reveals a great mix of stars.

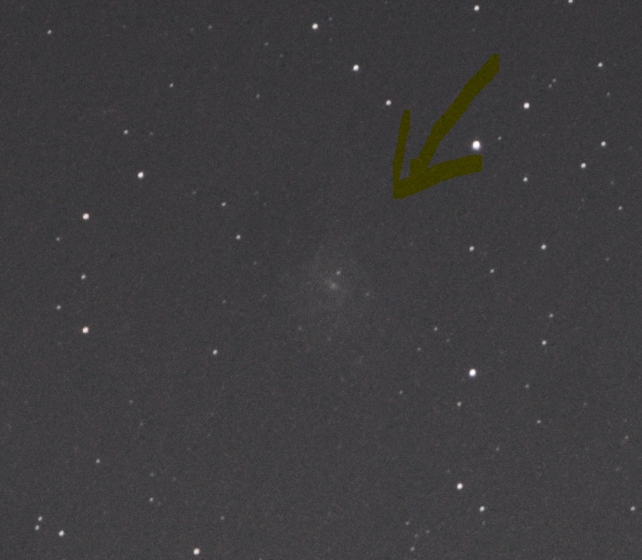
Stellarium showed the possibility to image a small nebula with a field of view of about 3.5 degrees of the zoom lens, so the next image was taken by pointing the camera into the approximate position of the sky … and the nebula shows up.
i.e. this blotch
The final shot of this series was taken in cold and clear conditions with low ISO and 100sec exposure by focusing carefully at a bright central star. It reveals a lot of details including nebulae and clusters.
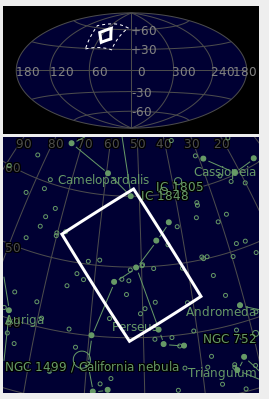
The astrometry.net web service can be used to locate any star image on the “map” by uploading it for analysis – which revealed that I had taken an image of the constellation Perseus.
Finally, here is also a quick single-exposure moon-shot I took using the ND filter.
