Interfacing a Raspberry PI 2 with an Adafruit PiTFT 2.2 HAT mini TFT display – the Windows IoT way!
As a Christmas project, I tried to bring up Windows IoT core on my RP2 and then implement a “driver” that can interface with Adafruit’s inexpensive PiTFT 2.2 display:
 +
+  =
= 
Prerequisites needed for this project:
- Raspberry PI 2
- PiTFT 2.2 board with GPIO header soldered on
- 16GB SD card and SD card reader
- Windows 10 PC with VS 2015 SP3
- RP2 wired to network (tip: fix IP of RP2 via MAC address in router), HDMI screen, and a keyboard/mouse
First, I connected the PiTFT display board to my PI2 using 2 extension ribbon-cables (14 wires each) which connect pins 1-28 of the PI2 to the corresponding ones on the PiTFT. This keeps the display flexible in my cluster-stack of ARM boards which contained the PI2. I then followed the published Easy Install steps to make sure the display works, i.e. boot up Adafruit’s custom Raspbian Linux distribution.
While Linux is a fine platform, the real goal was to run this on Windows 10 IoT core. So, next, one needs to get the Windows IoT install going on the RP2 which requires a few steps:
- Clear SD card using SDFormatter with Option ‘Format Size Adjustment = ON”
- Download, unpack and copy all NOOBS files to SD card
- Boot RP2 /w screen + keyboard/mouse + ethernet or wifi and select Windows IoT
- Pick Core RTM release
- Click OK to reboot and boot Windows IoT
After this initial setup, the Windows 10 installation on the PI2 can be accessed using a browser.

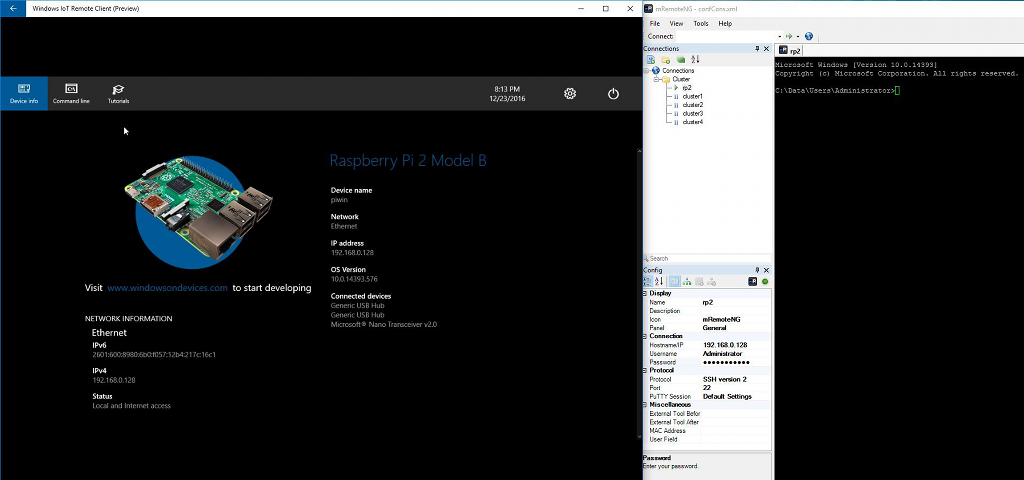
The interface provides some basic controls, iformation and can also be used to update the RTM release that NOOBS loads to the latest official version of Windows 10. The web portal also had some bugs: remote client access via the Windows IoT Remote Client (Preview) app didn’t initially work since the server portion wasn’t running and couldn’t be enabled with the web portal either. Thankfully, one can SSH into the PI2 and then run the following commands to schedule it for startup:
schtasks.exe /Create /SC ONSTART /TN \Microsoft\Windows\NanoRDP\Start /TR %SystemRoot%\\System32\\NanoRDPServer.exe /RU DefaultAccount /F
schtasks.exe /Run /TN \Microsoft\Windows\NanoRDP\Start
Windows IoT comes with a ton of samples code on github which can be opened in VS2015 and deployed to the PI2 for testing the overall workflow and verifying the new Windows IoT setup.
On to the real problem: getting the PiTFT 2.2 board to display some pixels.
The display is driven by an ILI9340 chip that uses 2 GPIO pins for basic data type and reset controls, and the SPI lines for command and data transfers. Bringing up a GIOP interface with the C# interface is dead simple. Similarly, the IoT documentation comes with some nice SPI coding samples in C# which make using that slightly more complicated interface easy as well. So I had quickly a skeleton IO-connection setup going, using code like this:
// Raspberry Pi 2
private const string SPI_CONTROLLER_NAME = "SPI0";
private const int SPI_CHIP_SELECT_LINE = 0;
// PITFT_2_2
private const int PITFT22_DATA_COMMAND_PIN = 25;
private const int PITFT22_RESET_PIN = 23;
// Get default controller
gpio = GpioController.GetDefault();
// GPIO pin number for the D/C pin
dcPin = gpio.OpenPin(PITFT22_DATA_COMMAND_PIN);
dcPin.Write(GpioPinValue.High);
dcPin.SetDriveMode(GpioPinDriveMode.Output);
// GPIO pin number for the RST pin
rstPin = gpio.OpenPin(PITFT22_RESET_PIN);
rstPin.SetDriveMode(GpioPinDriveMode.Output);
var spiSettings = new SpiConnectionSettings(SPI_CHIP_SELECT_LINE);
spiSettings.ClockFrequency = 32000000; //// 64000000 was not reliable
spiSettings.Mode = SpiMode.Mode0;
string spiDeviceSelector = SpiDevice.GetDeviceSelector(SPI_CONTROLLER_NAME);
                IReadOnlyList<DeviceInformation> devices =

                      await DeviceInformation.FindAllAsync(spiDeviceSelector);
spi = await SpiDevice.FromIdAsync(devices[0].Id, spiSettings);
Some of the various settings and port numbers were scavenged from a python library for this chip. The tricky part is to create the basic initialization sequence. Most of the sequence was taken from the fb_ili9340.c Linux driver code, but my version also comes with some additional modifications and tweaks necessary for correct operation which were pulled from the chip spec. (The full sequence is too long to copy in here – see the source code ZIP at the end of the article.)
After some mucking around with the RGB ordering and display rotation setup – I was running the board in “landscape” mode, but the default pixel transfer is for “portrait” ordering – I finally got it to work and show correct colors. The final step is to wire-up the XAML display to the TFT, by rendering the XAML into a bitmap, then copying the bitmap around a couple of times for color-space transformations from BGRA8 to RGB565, and finally sending it off to the display via the SPI interface. Code looks like this:
if (tft != null && tft.Initialized)
{
// Render parent to bitmap
var renderBitmap = new RenderTargetBitmap();
await renderBitmap.RenderAsync(this.parentGrid, tft.Width, tft.Height);
// Get the pixels
IBuffer pixelBuffer = await renderBitmap.GetPixelsAsync();
byte[] pixelsBGRA8 = pixelBuffer.ToArray();
// Transfer to display
tft.Clear(0);
tft.SetBitmap(pixelsBGRA8, renderBitmap.PixelWidth);
tft.Display();
}
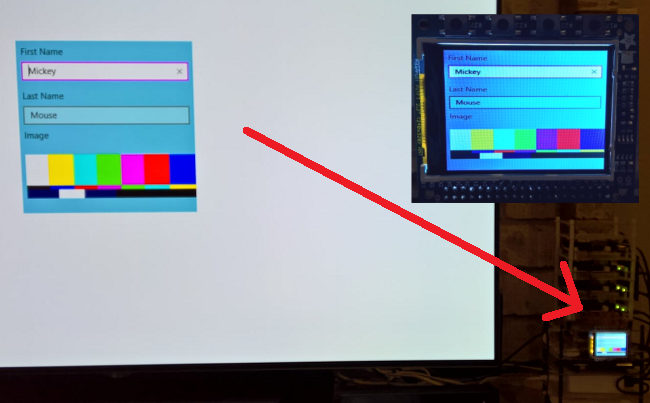
The test program wraps this routine up into the event handler of a DispatchTimer() that fires a few times a seconds, et voila …

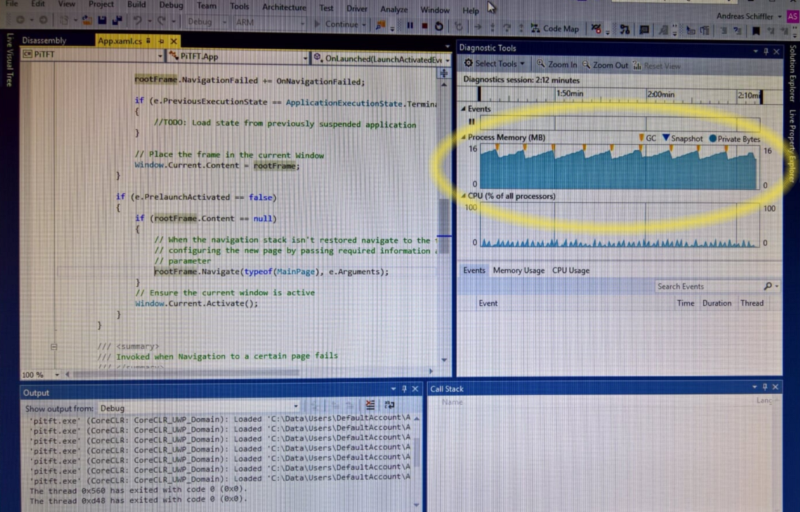
Limitations? yes, it is not real-time fast and you won’t be playing games with this; but it is good enough for informational displays, clocks, charts, or image slideshows. Unfortunately, the constant re-rendering of the XAML grid into memory will put some pressure on the GC which has to clean up the constantly created temporary bitmaps and pixel buffers.

The MIT licensed code for this project – a C# driver for the Adafruit PiTFT 2.2 – can be downloaded here.
